

Use CTRL + F to find the easter egg you're looking for
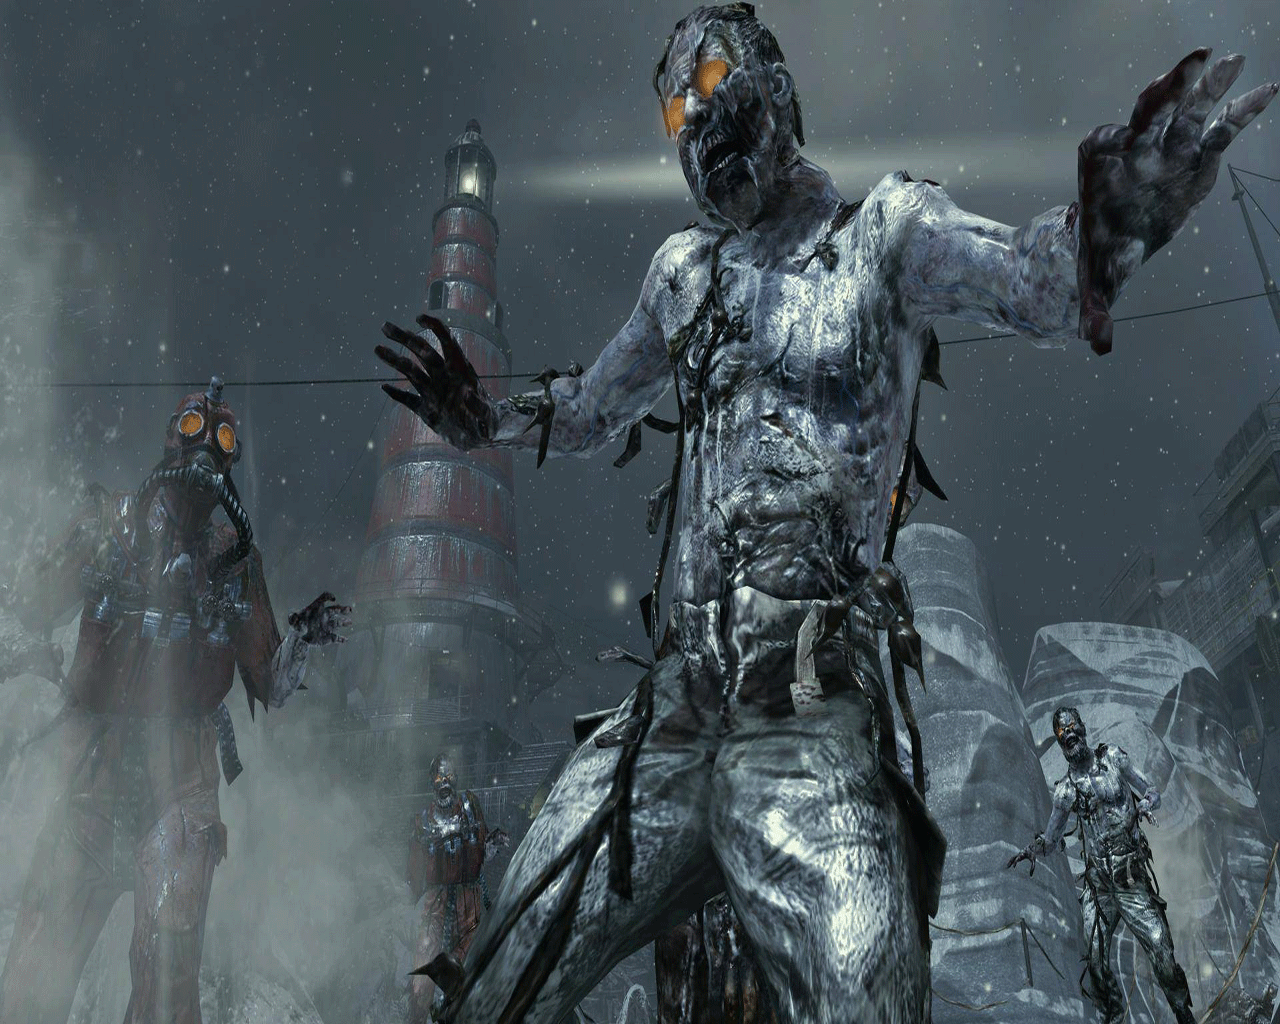
Ascension
In Ascension, at the first round, Gersch can be heard asking for help to "repair the mechanism" as well to hurry as "she is coming". This is the start of a puzzle to "repair" the Kassimir Mechanism and free Gersch. The following items are required (note that they are all required at once):
Gersch Device
Upgraded Ray Gun
Upgraded Thunder Gun
Matryoshka Dolls
Node 1
This first task is relatively easy. A player must have the Gersch Device for this part. In the area where the MP5K and the PhD Flopper are, if one looks out from the map to the left of the MP5K, there will be rubble but there will also be what appears to be a power generator with a glowing white light. If the player goes into the PhD Flopper room to the far back, one can hear a high-pitched whistling sound. The player with the Gersch Device must throw it onto the generator (if it bounces off the generator it will be okay, if it lands too far away the Device disappears). The player will see the generator get sucked into the black hole. At this point, Gersch tells the player to hurry and continue as 'she is getting closer'. Then the player must make their way to the lunar pad closest to the Stamin-Up. In the corner of the lunar pad room, there is a large terminal with a bright screen. Again the high-pitched sound can be heard. The player should press and hold the "use" button to activate the terminal and the screen will show part of the Illuminati symbol. At this point, the pod should show one light after this node is complete.
Node 2
This step has to be done during a Space Monkey round with four players. Space monkey rounds occur every 5-7 rounds, but only if the power has been turned on and at least one player has bought a perk. When these rounds begin, four switches will appear out of the walls close to all perk machines excluding Quick Revive and Mule Kick. The switches are small red buttons that can be hard to notice due to the darker lighting during the monkey rounds. The locations of the switches are:
Juggernog - opposite of the Perk-a-Cola machine.
PhD Flopper - left of the Perk-a-Cola machine.
Speed Cola - on the other side of the door frame of the Perk-a-Cola machine.
Stamin-Up - left of the Perk-a-Cola machine.
When all four players have gotten to the switches, they must be pressed at the same time (give or take a second) a player can count down from three, alternatively the player can hold the use button by the button and it will just beep constantly. If it's done correctly, all players will hear a beeping sound, and the pod will have two lights on. If it was done incorrectly, all players will hear a buzzing sound.
Node 3
This node is simple. At the end of a round, a couple of slow crawlers should be left to prevent interrupting the transmission, as this node takes two minutes to complete. At this point, the player must have launched the rocket to open the launch pad and the room where the Pack-a-Punch Machine is located. The player must lead the crawler(s) as far away as possible to avoid interruption, preferably to Stamin-Up. When the players enter the launch pad, there is a clock on the wall to the left showing 12:00. All players must now gather in front of the clock located in the room just before the Pack-a-Punch machine. This will now start a 2-minute countdown. During these 2 minutes, all players must stay on the pressure plate, but can do anything such as shoot or throw grenades in case the crawlers get close. When the 2 minutes are up, if done correctly, there will be an explosion (as if a Nuke was picked up) ending the round. At this point, there should be three lights active on the pod.
Node 4
This is the hardest node to complete. It is highly recommended to leave a couple of slow crawlers in the end of a round, as doing this is the middle of a round can be very difficult. Several letters can be seen floating above in a random order. To collect these letters, the players must use the Lunar Landers, but the letters must be collected in a certain order (to spell "LUNA"). To begin, the players should have the lander ready at the spawn room. One player should stand on the lander whilst another player heads to the lunar pad near the Stamin-Up. That player must then call the lander at that point. The player on the lander will be flying over to the lunar pad where it was called but will fly into the floating letter 'L' and collected it. Again, a player must stay on the Lander whilst another player calls the lander back to the spawn room. This time, the player on the lander will collect the letter 'U'. Once again, a player stays on the lander while another player calls it to the pad closest to Speed Cola and Sickle. The player on the lander will collect the letter 'N'. Finally have one player on the lander whilst another calls it back to the pad closest to Stamin-Up. They will collect the last letter 'A'. This spells out 'LUNA'. All lights should now be active on the pod.
Note: It is confirmed there is no 'R' to collect. LUNA is 'Moon' in multiple languages.
Node 5
At this point, after finishing all the other nodes, head back to the pod, which should now have all four lights on. The pod is located next to the claymores in the Lunar Lander room next to the Stamin-Up machine. The player will hear the howling sound again. If the player looks carefully, there is a small glowing orb on the ground. The way to accomplish this task is to have one player throw the Gersch Device, then shoot the black hole with some Porter's X2 Ray Gun shots, and 2 Zeus Cannon shots, along with some Matryoshka Dolls.
After completing this task, Gersch thanks the players for freeing him. Each player will then be given a Death Machine that lasts for 90 seconds. Soon after, the screen will turn to black and white when Samantha screams (if the player listens closely, they can hear her say "Come find me" very quietly). When her scream ends, the screen goes back to color. The node puzzle is complete.
Call of the Dead
Explanation
Underneath the room with PhD Flopper, there is a locked door. Once close enough with the power turned on, the player will hear Dempsey knocking on the door asking for help. Once the player knifes the door, the player can hear Richtofen explaining that the teleporter sent them too far in time and that they are now trapped inside a dark room, asking the player on the other side of the door for help. Takeo is sick from teleporting and vomits multiple times, because of this the player never hears him speaking. Apparently the Kassimir Mechanism had something to do with the teleporter malfunction, as Dempsey can be heard cursing Gersch. It is likely, however, that Richtofen influenced the Kassimir Mechanism to teleport the crew to this Siberian outpost for the Golden Rod.
Solo Process
First Step
The first step is to find a fuse. After listening to the conversation, go upstairs to the room with PhD Flopper. It will be either on the desk next to or across PhD Flopper or by the corner of the locker. Once obtained, go back to the door and insert it in the fuse box to the right of the door.
Second Step
After the first step is completed, there is now light in the room allowing the Original Characters to finally see. While discussing, Nikolai activates the MDT security system, not knowing what it would do. The player must destroy four generators, signaled by four glowing red orbs, disabling the MDT security system. This can be done with all explosive weapons, however Ray Gun, M72 LAW and Semtex must land exactly on top of the generator in order to disable it, while China Lake, Crossbow, Scavenger, M67 Grenades and M203 are much easier to use.
At this point, the Scavenger is more likely to appear in the Mystery Box.
Generator Locations
Across from the locked door where the original characters are (this is likely to show the player what they look like).
Outside of the left window in the Stamin-Up building. Can also be seen from on top of the lighthouse at the Mystery Box spawn point.
Over the left railing of the ship near Double Tap Root Beer.
In between the second ship and the spawn area, on the right side between two ice shelves.
After destroying all the orbs, knife the door to begin the next step.
Third Step
In the control room (the room with the power switch) set the steering wheel to the 5 o'clock position (move the wheel so the brown handle faces 5 o'clock), pull the first lever once, and the third lever three times (from left to right). A foghorn is heard, then a submarine will surface and shine a mysterious green light that will then reflect into the lighthouse.
Fourth Step
Use the V-R11 on a zombie, and instead of running into a water pool, he will run into the bottom of the lighthouse and into the green light. The player must kill him before he reaches the top. Take the Golden Rod that appears and insert it into the ear tube next to the door just like the vodka in Co-op.
At any time at this step, the V-R11 will become more likely to appear in the mystery box, just like the Scavenger in Step Two.
Final Step
Use the knife on the fusebox to fix it, ending the easter egg (the player has to wait for the characters' dialog to finish). The player will then receive the Wunderwaffe DG-2 as the Lightning Bolt power-up.
Co-op Process
First Step
The first step is to find a fuse. After listening to the conversation, knife the door then go upstairs to the room with PhD Flopper. It will be either on the desk next to or across PhD Flopper or in the corner of the locker. Once obtained, go back to the door and insert it in the fuse box next to the door.
Second Step
After the first step is completed, there is now light in the room allowing the Original Characters to finally see. While discussing, Nikolai activates the MDT security system, not knowing what it would do. The player must destroy four generators, signaled by four glowing red orbs, disabling the MDT security system. This can be done by any explosive device, though some are easier to use than others due to larger splash radius.
Generator Locations
Across from the locked door where the original characters are (this is likely to show the player what they look like).
Outside of the left window in the Stamin-Up building. Can also be seen from on top of the lighthouse at the Mystery Box spawn point.
Over the left railing of the ship near Double Tap Root Beer.
In between the second ship and the spawn area, on the right side between two ice shelves.
Third Step
After completing the second step, Nikolai asks for some vodka. The player can find the vodka in multiple places. Usually it appears at the front of the lighthouse, outside of the door where the mystery box spawns. It can also spawn on the stairway leading down from the mystery box to the PhD Flopper room. It may spawn on the first ship, just on the right of the stairs on the second floor, above the MPL.
It can also spawn on the first ship, on the ledge before the player jumps into the second ship. One player has to stand under the Vodka bottle ready to pick it, while the other player knifes it causing it to fall down. If the player fails to catch the bottle, another one will respawn at a different place. It can also spawn just above the room where the players are trapped like the previous one, where the player has to knife the bottle, and catch the bottle.
You must then place the vodka in the transfer tube, on the opposite side to the fuse box.
Fourth Step
The player must set the security dials in the lighthouse to its proper code. There is a dial on each level, the code being 2746 from top to bottom. This is a annoying task for the player to complete, because when a dial is changed, the ones below and above it will increase by one. To get the dials to become 2746 these simple steps must be followed. The dials to start out exactly the same every time. The colors of the dials from top to bottom are Yellow, Orange, Blue, and Purple on bottom. Because of ambient lighting conditions, the bottom dial may not appear as purple on first sight. The steps are:
Turn the Yellow dial to 2.
Turn the Blue dial until orange is set to 7.
Turn the Purple dial to 6.
Turn the Orange dial until blue is set to 4.
Turn the Yellow dial to 2, again.
The final result should have 2 on the Yellow dial, 7 on the Orange dial, 4 on the Blue dial and 6 on the Purple dial.
Note: If the dials aren't correct just redo the turns again and they should fix themselves.
Fifth Step
Four Morse Code radios must be activated in the correct order. The Morse Code radios in the correct order:
The radio under the power room, on top of a cabinet on the right side.
The radio located next to Stamin-Up, on top of the barrel.
The radio near the back of the second ship, where the player can buy Semtex grenades. It is inside the train cart next to a window on the right hand side.
The radio under the steps going to the door where the original characters are trapped, on top of a cabinet
Sixth Step
In the control room (the room with the power switch) set the steering wheel to the 5 o'clock position (move the wheel so the brown handle faces 5 o'clock), pull the first lever once, and the third lever three times (from left to right). A foghorn is heard, then a submarine will surface and shine a mysterious green light that will then reflect into the lighthouse.
Seventh Step
The sound created by the foghorn must be matched using the foghorns around the lighthouse. The foghorn from the sub can be best heard from the end of the lighthouse zipline; however the player does not even need to hear it because the order is the same every single time. This has been confirmed multiple times. The sub will NOT disappear if the player takes too long. It will stay there for as many rounds needed. It gives the player time to get some Ray Guns and a V-R11 (The V-R11 is required for the next step). The order below is the correct order. If the player messes up the order, or the sub will not appear, simply start the next round and it will reset. In order to activate the foghorns, press and hold X or the Square Button, for the Xbox 360 or PS3 respectively.
The Foghorn Locations in order are:
At the base of the lighthouse, next to the pool of water.
After the slide to Speed Cola, around the right side of the corner in the water.
At the base of the lighthouse, on the left hand side next to the building.
After the slide to Speed Cola, behind the huge rock in the center.
Eighth Step
The Golden Rod.
Use the V-R11 and shoot a zombie close to the lighthouse, he will run into the bottom of the lighthouse and into the green light at the staircase. It is a lot easier if the player has two crawlers before they do this. Shoot one of the crawlers to get the rod but keep the other so that the next round will not start. Otherwise the player will be overrun by zombies and may not get the achievement/trophy. He will slowly start to float up, during this the players must shoot him until he stops moving and goes to a position similar to as in Second Chance. A lot of damage has to be done to him, so weapons such as LMGs, Ray Gun or Scavenger works best on him. After this, the Golden Rod will appear at the bottom of the Lighthouse. Take the Golden Rod and insert it into the transfer tube next to the door just like the vodka bottle.
Final Step
Use the knife on the fuse box to fix it.
The End
With the teleporter fixed, and the Golden Rod in hand, the crew teleports to Shangri-La. The player is given a gamer picture of Takeo or Nikolai's picture from the revamped Shi No Numa depending on whether the player completes it on solo or co-op (both pictures are awarded if the player completes it in co-op), an achievement (both are awarded if the player completes it in co-op), and the Lightning Bolt. The Lightning Bolt will drop from then on whenever the player kills George A. Romero instead of a Death Machine. Just like the Death Machine, only one player can have the Wunderwaffe DG-2 at one time; if the player kills George Romero while someone has the Wunderwaffe DG-2, they will get the Death Machine instead of the Wunderwaffe DG-2. It should be noted that whilst the player has the Wunderwaffe DG-2, one cannot switch weapons, revive downed teammates, throw grenades or buy something off the wall, due to its power-up nature. However, unlike with the Death Machine, the player can sprint.
Shangri La
Requirements
Four players
A Napalm Zombie
Spikemores (and zombies to trigger them)
An explosive weapon
Pack-a-Punched 31-79 JGb215 (The Fractalizer, does not need to be upgraded in the earlier step where it is used)
Explanation
Brock and Gary, two explorers, were looking for the temple to prove the existence of Agartha. They accidentally triggered the eclipse (even though it takes four players to activate it in-game) and Zombies attacked them. Gary died first and Brock followed later. The players change their fate by completing the steps of the puzzle, which sends them back to the future for every successfully completed step. When they finally reach the Focusing Stone, they travel back in time again and it becomes apparent to the players that they've been returned to the moment they discovered the temple, meaning they're stuck in a never-ending loop.
Step 1
In the starting room once the power is turned on, there will be four dials each on their own wall by Quick Revive. When all four players press 'Square' (PS3) or 'X' (360) at the same time, time will distort, causing the players to be sent into the past (proven by some of the things the character says), the moon to eclipse the sun, and a giant Element 115 meteor to rest above the temple in the spawn area.
The Element 115 meteorite that appears on top of the temple.
The eclipse that happens in the past.
Step 2
Near the MPL, there appear to be two characters trapped in the locked area behind the weapon. A button must be pressed, similar to those near Quick Revive, in order to get them talking. They want the players to set them free, similar to Gersch in Kassimir Mechanism and the four characters in Original Characters Trapped easter eggs. After they finish their dialog, magical plates can be found scattered on the floor around the areas outside the spawn, 12 on each side.
Step 3
After activating the switch from the previous step, several panels will appear along the area on the bridge, near the rotating statue and the area which contains the MPL, somewhat perpendicular to each other. The players have to make them all disappear to complete this step of the easter egg. At first it seems confusing but the method is simple. On one side, one player stands on a plate and tells another player what the symbol is. That player then steps off the tile whilst the player in the other area searches for the matching plate. Once the pair are found both players step on and those plates and they will disappear. Then simply repeat for every other one until all plates are gone. If a pair is incorrectly matched all plates will re appear and have to be paired up again. Also note that if a player stands on a plate whilst the other checks for a match, all symbols will change to a different plate. Note that this must be completed in 4–5 minutes or players will return to the present and will have to start over again. The following are known Illuminati symbols to appear on the tiles:
A Female gender symbol.
3 Short straight lines intersected by a long straight line.
A Diamond outline.
A star that looks like a asterisk (*)
A crescent moon
A Circle with a straight line cutting it in half.
A Circle with a small dot in the middle.
3 Dots arranged in a triangle.
A Triangle outline.
A "D" shape
A "T" like shape that has a line through it.
2 arcs crossing
If done correctly the player will hear a sound and a Focusing Crystal will appear on top of the MPL boulder.
Step 4
Go down to the Water Slide, but do not move from the bottom. With three players standing on the pressure plate, which is the grate with water underneath it in the center of the room and have the fourth take the slide, the idea being that the 3 players on the grate are weighing it down so that when the 4th player comes down the slide, he hits the plate with enough force to activate it. Following the plate's activation, the Eclipse should end, ending the step.
Step 5
Go to the waterfall, there should be a diamond on top of the waterfall. It can be knocked down with an explosive or a Ray Gun. When it's on the ground, shoot it with the 31-79 JGb215, it should shrink. Knife it and it goes into the slide to the geyser. The players must launch the diamond with the geyser and it should land on a tower. A new diamond should spawn, indicating that the step was completed successfully.
Step 6
The players now have to go to the tunnel that has a pressure plate in a crevice. Next to the pressure plate needed to access Pack-a-Punch, there is a gas pipe. The wheel has to be turned 4 times, until the characters can be heard talking about the gas receding. If done correctly, along the walls and ceilings there should be several gas leaks, starting from the MPL entrance all the way to the power room. And when the player's character passes through there, one can hear them coughing.
Step 7
To complete this step, there must be a calm Napalm Zombie in the past. The players have to walk through the tunnel, luring the Napalm Zombie from the MPL entrance through the cave and setting the gas leaks from the previous step on fire. There are several leaks clustered about: at the entrance to the cave, near the spout launcher, and just before the power room. If done correctly, when the players return to the crevice and the tube, the lever next to it will be raised. Press the action button (X, square) to lower it. This part MUST be done during the same eclipse as lighting the gas. When the characters start talking about the floor being covered in lava, this signifies that the step was successful.
Step 8
The players must travel back to the past for this step. In the tunnel with the MP5k on a board, there are now 4 holes on the side of the tunnel. The holes must be plugged with Spikemores. The best way is to lure crawlers, or the previous Napalm Zombie, towards the tunnels and place the Spikemore facing the holes, so that the Punji spikes get lodged into the holes. After this is done, the players have to go to the bottom of the waterfall. On one side of the boulder in the center, there is a brick wall, with a brick sticking out saying "Do not hold "X" /Square. Hold "X"/Square and the players will return to the present, signifying that the step was successful. Also, a new diamond will appear above the mud pit temple.
Step 9
The players have to go to the past again for this step. There are 12 panels spread around. There are 5 panels in the spawn room, 2 in the mudroom area, 2 by the minecart, 2 in the stakeout room, and 1 by the left power switch. It is similar to Step 3, but instead of stepping on the panels, they must be knifed. When all 12 panels have been lit up, over by the mine cart gate, out of bounds, a snare trap can be seen. Blow it up with an explosive, such as a Monkey Bomb. If done correctly, the characters will say that it has worked, and the players will return to the present.
Step 10
After completing Step 9, there is a radio found near the Minecart gate on a barrel, stating a code, which is "16, 1, 3, 4". Players have go into the past for this to work. After going to the past, players will have to go into the mud pit temple and set the dial to their corresponding numbers as the top number:
The first one, coming from the eclipse button area, is the far right one. Switch it to ' [ | - '
The second one is directly behind the first one (near right side from the eclipse button area). Switch it to one dot.
The third one is diagonal from the second one (far left side from the eclipse button area). Switch it to three dots.
The fourth one is behind the third one (near left side from the eclipse button area). Switch it to four dots.
After this is done, the characters should say that the code worked. If done correctly, a diamond will appear above the mud pit temple, signifying that the step was successful.
Step 11
After the previous step, in the present, by the right side of the stairs leading up to the Pack-a-Punch Machine, on the floor by the statue the players will find a radio. The radio says that Brock lost his bag of Dynamite somewhere while being chased by zombies. The players have to find the bag of Dynamite. The Dynamite will be on the Focusing Crystal near the Minecart gate. First, a player have to charge the Focusing Crystals, by finding the four gongs that make a resonating sound. To make sure that a player is knifing the right gongs, knife one and then look at the Focusing Crystals, if they are glowing red the player are knifing the wrong one, if they don't glow at all then find the other three that make the same noise. Once this is done, the Focusing Crystal will glow yellow and Treyarch's Symbol will appear. On one Focusing Crystals hangs Dynamite and now the player has to shoot it with The Fractalizer, the beam bouncing along the other Focusing Crystals and come back and knock off the Dynamite.
Step 12
The players have to travel into the past for this step. Once the players have obtained the Dynamite, they have to shoot the Focusing Crystal above the Mud Pit temple (Behind a palm tree if one look at it from spawn). A player has to charge the crystals again, and must upgrade their 31-79 JGb215, or it will not work and a character will say something about not enough power. After the player has charged the Focusing Crystals and has an upgraded 31-79 JGb215, a player must shoot the Focusing Crystal above the mud pit temple, the beam traveling between the Focusing Crystals becoming more powerful. When it hits the last crystal, 3 beams of orange light will hit the giant 115 meteorite and it will shrink and fall into the temple.
Step 13
Once the giant meteorite has shrunk, the player will have to access the Pack-a-Punch Machine. The machine will have vanished and the back wall is accessible. Brock says that he can blow up the wall with the Dynamite gained by the players from a previous step. After the conversation, the water will wash the players down and they will have to access the Pack-a-Punch Machine again. After the player access the temple again, the wall will be gone, and on an altar, the Focusing Stone will be floating in the center. To obtain the stone, the player have to hold the action button. Only the person who picks up the stone gets all eight Perk-a-Colas for the rest of the game. Only one player has the focusing stone but all 4 players get the Time Travel Will Tell achievement/trophy.
Repeating the Easter Egg
Once the Easter Egg is complete, the eclipse buttons will be pushed in and the eclipse cannot be restarted. However, a new radio will appear at the base of the Pack-a-Punch Temple with the water that flushes down following the acquisition of the Focusing Stone. Listen to the radio and, after the majority of it has played, the buttons will pop out again. This may be repeated until all four players have the Focusing Stone; however, it cannot be repeated after the fourth player has taken it.
Moon
Requirements
A minimum of two players must be in an online party. LAN party/System Link or splitscreen do not work. Doing the steps require lots of time and patience. Making a crawler zombie (by blowing a zombie's legs off with explosives) whilst doing the steps at the end of a round helps significantly to give the player more time and freedom to do the necessary.
To complete the whole easter egg, the players must have the weapons/devices listed below:
QEDs
Wave Gun
Hacker
Gersch Device
The required weapons do not have to be obtained at one time, and can be used individually.
Not all of the following steps below have to follow the order in which they are listed and may be done as soon as the opportunity to complete them is available.
Step 1
After turning on the power, return outside of the Receiving Bay on the Olympia's side in front of tunnel 6 there are four computer terminals lined up near a cliff. Each computer represents a color: red, green, blue, and yellow (colors change place if you fail or start a new game). When the step is started, all of the computers will flash one color. The player must press the use button on the computer with that color. The computers will flash again, this time with two colors, and the player will once again have to match them. This step will continue until all of the computers flash green and a message is heard. If the player messes up, the step is restarted.
Step 2
Proceed to the second floor of the laboratory. On a wall to the left of the stairs leading to the third floor laboratory, there will be four dim switches lined up next to each other. One of these must be hacked for 500 points. After doing so, the player will have to search all 3 floors of the laboratory for four white panel boxes with bright green lights.A total of 7 panels is spread between the three floors, two on the top floor, two on the second, and three on the third. The player must hack all 4 lit panels within 60 seconds or the player will have to hack one of the red buttons again to restart the process, ultimately costing the player another 500 points for each failed attempt. Each of these lit panels makes a buzzing sound that increases in volume as a player reaches it. Once the player has successfully hacked four green light panels the player must head back to the four lined up Red Buttons, the player(s) needs to press all four of them rapidly. It is easiest to just go from left to right or vice versa rapidly pressing the 'use/action' button.
When the player is successful, they will all pulsate red, and the various buttons around them will flash as well. Additionally, the center of the Vril Interface on the front of the pyramid will now be indented.
Step 3
The player must then let excavator Pi breach tunnel 6. Immediately after, take the hacker back to the spawn area, and hack the excavator terminal. Once the player returns to Tunnel 6, they will find the Vril Sphere (the characters refer to it as the egg but in truth it is a Vril Device) lying on the ground near the M16. The Vril Sphere must be moved into the center of the Vril Interface on the pyramid, or M.P.D . The Sphere must be knifed or shot to get it moving. Once knifed, it will begin to float towards a satellite dish on top of the spawn. If the egg gets stuck, simply knife it again or shoot it, and remember to open doors for it.
After it reaches the dish, it must be shot with the Wave Gun to have it fall down and travel towards tunnel 11. This is the only part of the easter egg where the Wave Gun is needed. Eventually the Sphere will get stuck in a tight corner in the ceiling, just above a barrier adjacent to the Stamin-Up perk machine. To get it out, either throw a grenade, or shoot any projectiles that induce splash damage (such as Ray Gun shots, although it can be freed with bullets if shot from the right angle). Then it will merge with the plate in front of the pyramid and a glass canister will rise from the floor close to the pyramid's corner.
Step 4
A cylindrical container will rise in the front right corner (if the player is in front of the plate) of the Pyramid, the player must kill 25 zombies near this tube and have their souls sucked into the tube (the range is very short). Zombies that are killed within range will have a red stream of dust emit out and into the ceiling. Zombies killed via Nukes will count. When the tube is full it will make a sound, the player then pulls a switch that looks like the power switch on the left wall. The pyramid will open revealing Samantha Maxis and rewarding everyone with a 90-second Death Machine.
Step 5
Go back to Area 51, and look to the right side of the teleporter. The player will see a beam structure with some hexagonal-shaped plates stored on it. Throw a grenade to get the plates down (the character will mention the loose plates if done correctly) and then throw a Gersch Device. If done correctly the plates should be on the teleporter with the player, and the player should teleport back.
Step 6
The player should see the plates near the Quick Revive in the spawn room. The player must throw a QED on them so that they move to the right side of the room, and stand upright in two brackets on a small machine next to a computer.
Step 7
Now the player has to look around the labs for a lead wire. It is long, curved, and silver, and is located on any floor of the labs. It may be on the ground, against a wall or crate, or inside any desk where the Hacker may spawn. This can be found at any point before this step as well. Also, it can spawn outside on the Moon near the entrance of the teleporter or by the crates to the right of the door leading outside. It can also spawn in the starting room by the excavator switch. Although, these three locations are rare.
Step 8
Return to the spawn building, and locate the computer that the plates have moved to. Place the Vril Generator between the plates, and connect the lead wire between the two pieces of equipment. Have the person playing as Richtofen repeatedly use the action button on the computer to the left of the plates. The player will know it is working when they hear the sounds of computer keys being tapped. Continue pressing the action button until a voiceover is heard; listen to this voiceover until it is done. The player will know when he/she is done after the computer screen goes red, green, red then green again. The player will know the step is complete when the Vril Generator begins to glow brightly. Now retrieve the Vril Generator. (On the PS3 version, there is a glitch, if there is no gravity in the receiving area, sometimes you will not be able to complete this part of the easter egg.
Step 9
Go back to the open pyramid. Four tubes will appear, and the player must kill now 25 zombies by each. After all the tubes have been filled, put the Vril Generator in the slot in front of the pyramid. As with step 4, you will know you are filling the tubes when red souls fly out of zombies. However, Samantha will also begin to scream and violently shake the screen as the tubes fill. Samantha and Richtofen should switch souls after the Vril Generator is inserted, which will then give the person playing as Richtofen all 8 perks permanently. At this point, the Vril Generator cannot be removed from the Vril Interface on the M.P.D.
Step 10
Throw a QED directly onto the Vril Interface symbol on the front of the Pyramid in the power room to make the Vril Sphere move again. It should launch over to the Simon Says machine.
Step 11
Play the electronic color-game three times (one for each rocket). Unlike the first time, the game begins by showing the player the first three colors, then four, and five on the last time around. This makes it much more difficult to complete. If the player does finish it correctly, Maxis will say something about controlling the station, and asks you to move the Vril sphere.
(Note: Steps 10-12 are interchangeable and may be done in any order.)
Step 12
Now take a Gersch Device and throw it near the Vril Sphere, if done right, the sphere will get teleported. Maxis will say something, and a countdown should start. The 3 rockets will be launched toward Earth (30–40 seconds) and incinerate it. Upon impact, the ground shakes severely, and all players will receive all 8 perks for the remainder of the game. The perks will remain even through being downed or death.
